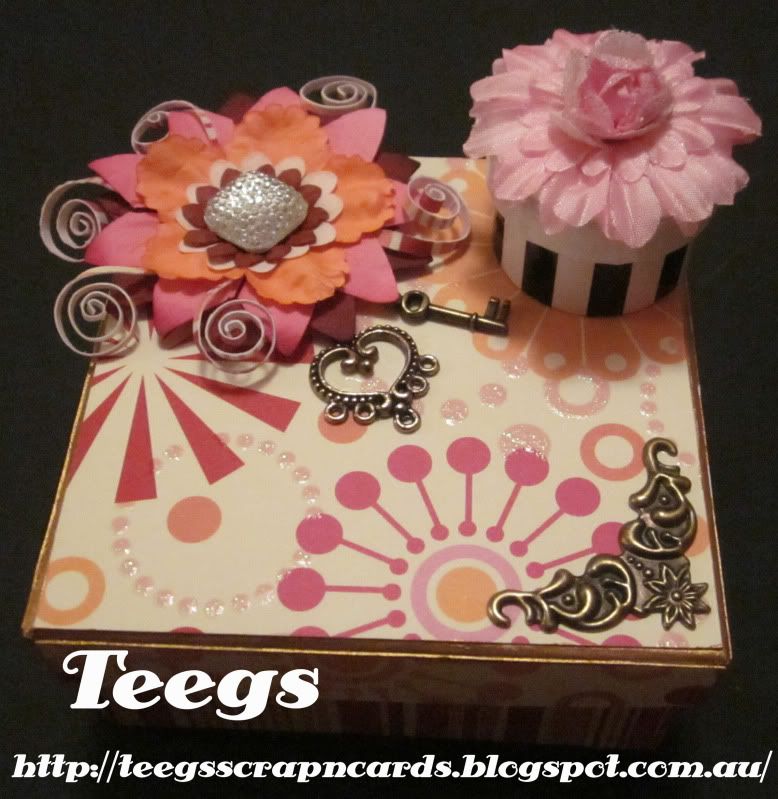
Tuesday 28 February 2012

2 Gift Boxes

The theme at Willow Sketchie Challenge this week is "Anything Goes", so I decided to do something a bit different and make a couple of gift boxes instead of a card for my entry. Hope you all like them. :D

2 Gift Boxes


To make these gift boxes I first went through my craft goodies to see what  boxes I had in there.


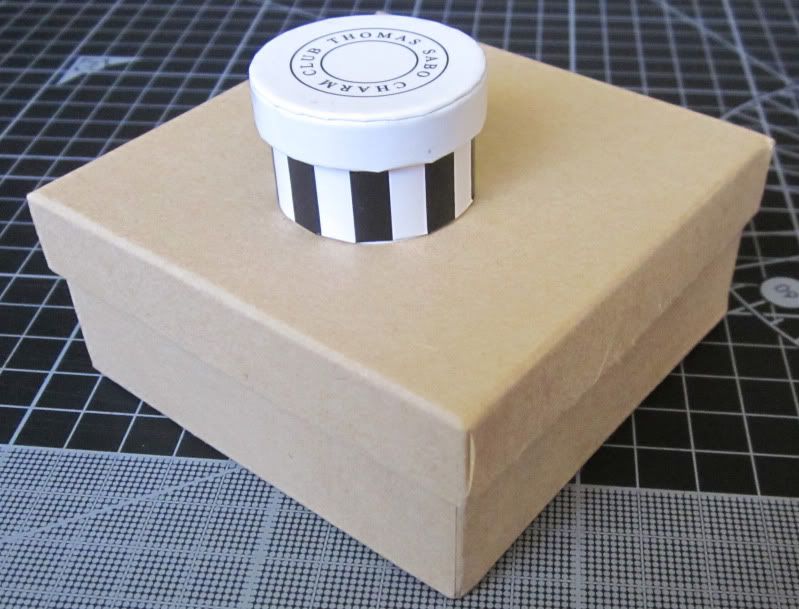
I decided on an empty "Thomas Sabo" charm box and a square paper mache box. I started with the paper mache box first.


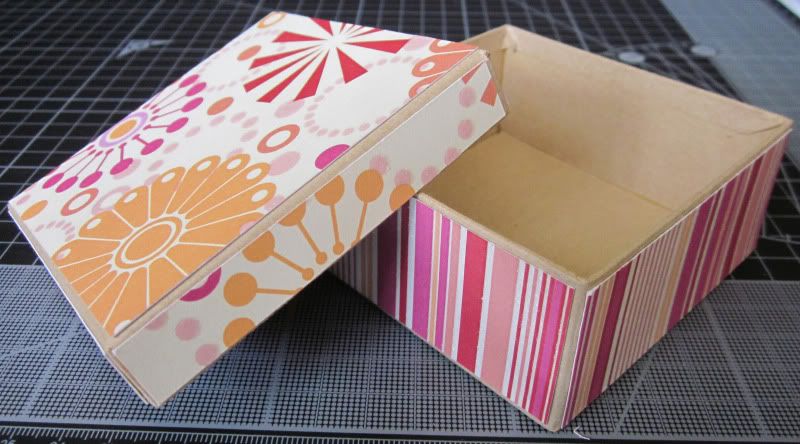
I covered the lid with a glitter patterned cardstock, using a separate piece for each surface of the lid. I then did the same for the box itself using a co-ordinating glitter striped cardstock. I then painted the edges of the box with gold acrylic paint.


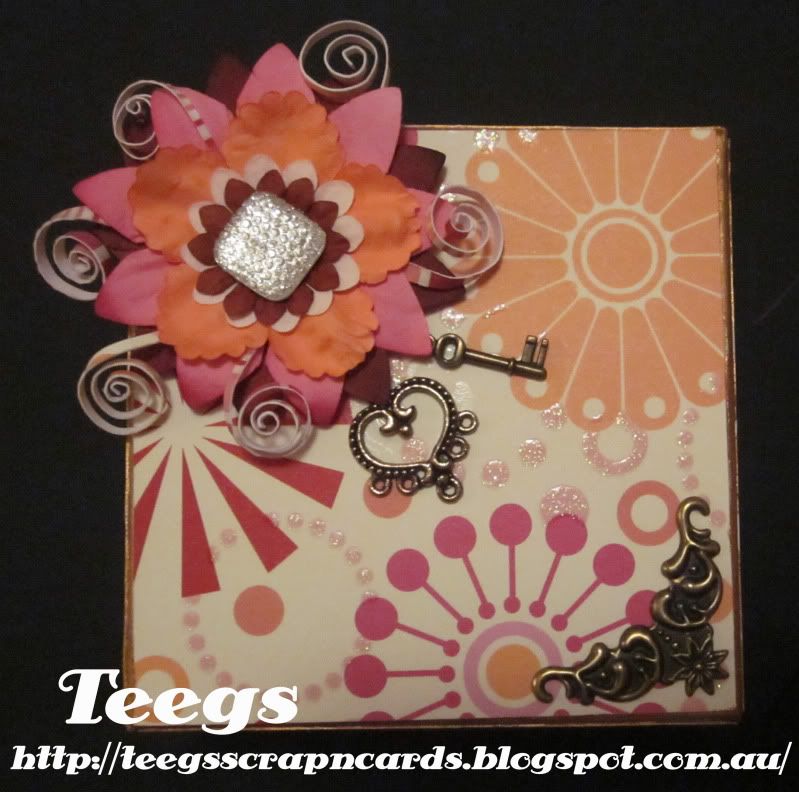
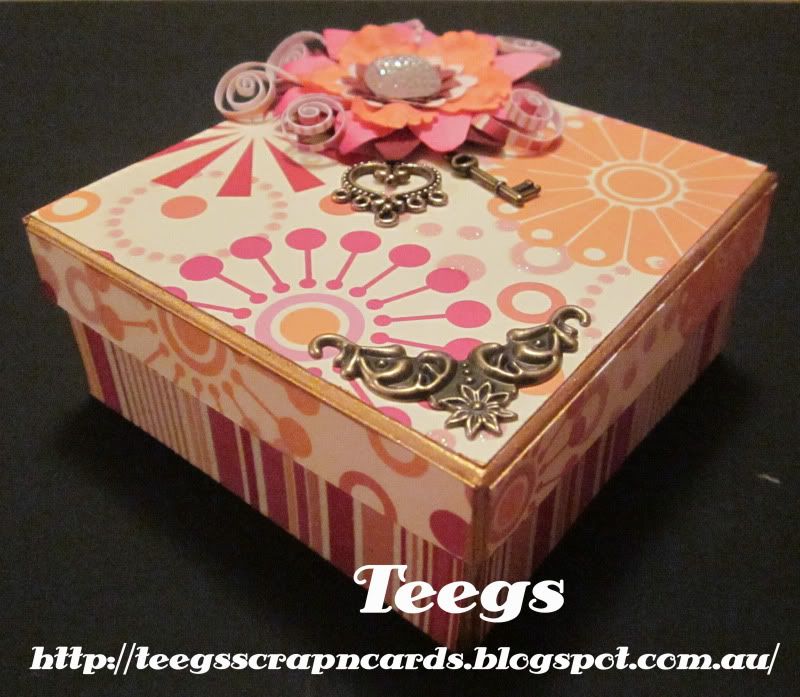
I then made a flower embellishment out of several paper flowers (which I held in place with a small brad), I curled up strips of scrap cardstock and glued them in amongst the flowers and next I glued a square diamonte to the center. I then attached it to the top left corner of the box lid. Lastly I glued a few metal embellishments onto the lid as well.


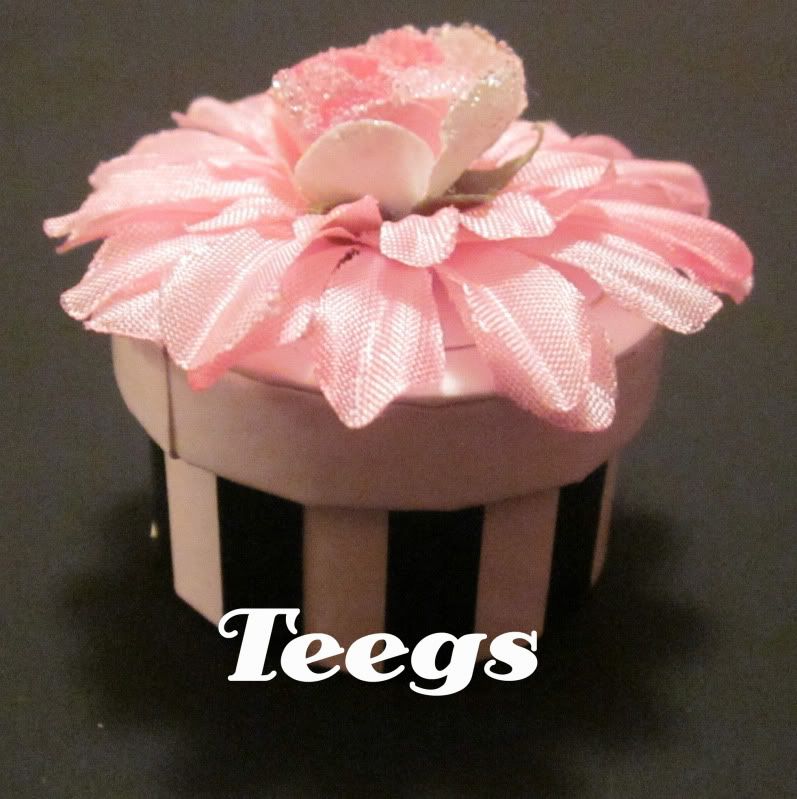
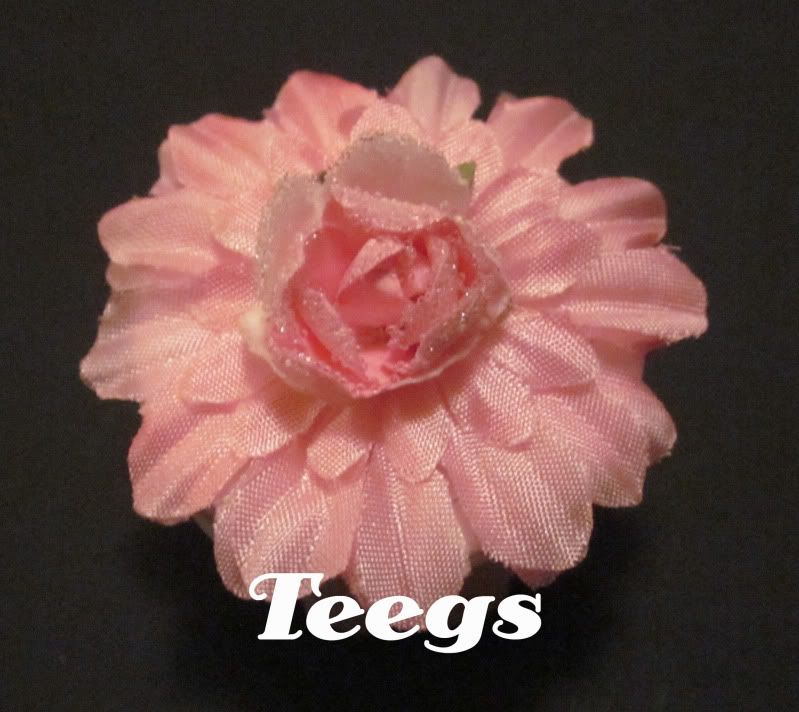
I decided to keep the empty "Thomas Sabo" charm box relatively simple, as I quite like the stripes on the original box. So I cut a small circle out of white card which I attached to the center of the lid (to cover the writing). I then made a flower embellishment for the lid using 2 medium and one small pink silk flowers and a pink pre made paper rosette which I attached to the center of them by poking the stem (as they came in a bunch and I left approx 1.5cm of stem on it) through each silk flower and then bending it at a 90 degree angle to push flat on the back of the flowers. Lastly I glued it to the center of the box lid.

I quite enjoyed making something other than a card for once and I would like to thank Hazel and the design team at Willow Sketchie Challenge for a fun theme. Good luck to all that enter. :D

Tuesday 21 February 2012

Shoe Of Purple Roses Birthday Card

Finally got around to making my entry for this week's Willow Sketchie Challenge. Has been a busy last few days for us, as we had to move my Boyfriend out of his Mother's house into my Parent's house with me. He helped me move some of his boxes so I could get to my craft stuff and make my card tonight. Hope you all like it. :D

Shoe Of Purple Roses Birthday Card


I used white card for my base card, which I covered with a purple glittered patterned cardstock. I then cut a square out of pink patterned paper. I cut a rectangle out of black glitter patterned cardstock and used a 3 heart rounded corner punch on the corners, I then attached it towards the bottom of my card. I cut a triangle out of pink patterned paper and attached it to the bottom left corner. I then glued a raspberry satin bow to the triangle.


I coloured in a free Beary Wishes Butterfly and Roses Digi Stamp in Photoshop, printed it on white card and trimmed around the shoe and roses part of the digi only. I then glued it to the center of the pink patterned square. Next I applied glitter glue to the roses and set aside to dry. Once dry I attached the image towards the top of my card. I then cut the back off 3 metallic pink brads and glued them down the top right side of my card. Lastly I used my labeler and pink metallic label tape to make the "Happy Birthday" sentiment, which I then attached to the black glitter patterned rectangle.


I was very pleased with how this card turned out and I would like to thank Anne-Marie from Willow Sketchie Challenge for a fantastic sketch. Good luck to all that enter. :D


Tuesday 14 February 2012

Fun In The Rain Birthday Card

I got my Craft Robo last Friday, and have been playing with it all week, downloading templates, getting used to the settings, program and even the cutting itself. So I thought seeing as I have had several plays with it using scrap paper, it was time to make a card using it. And what better card to make with it than my entry in this week's Willow Sketchie Challenge. Hope you all like it. :D

Fun In The Rain Birthday Card


I used white card for my base card, which I then covered with a glittered multi-coloured patterned paper. Then using my Craft Robo I cut out a patterned 10 x 10cm square out of blue patterned paper, and a plain 10 x 10cm square out of purple paper. I then glued the blue square to the purple square.


I coloured in a free Sliekje Just Cute Digi Stamp in Photoshop, printed it on white card and trimmed it to a square. I then wrote "Happy Birthday" on a pre-cut orange tag and tied a pink ribbon through the hole in the tag. I attached the end of the tag to the back of my purple and blue square using double sided tape. Next I attached the purple and blue square to the top left corner of my card, and the digi to the bottom right corner. Lastly I punched 3 holes across the bottom left of my card and set 3 large black eyelets in them.

I enjoyed using my Craft Robo to make this card and I would like to thank Claire from Willow Sketchie Challenge for her fantastic sketch. Good luck to all that enter. :D

Wednesday 8 February 2012

Kitty Tunes Birthday Card

Thought that seeing as I got my entry for this week's Willow Sketchie Challenge in early that I would make another one. Hope you all like it. :D

Kitty Tunes Birthday Card


I used white card for my base card, which I covered with a glitter multi-coloured patterned paper.


I coloured in a free Sliekje Music Kitten Digi Stamp in Photoshop, printed it on white card and then trimmed it to a rectangle. I then matted it to blue metallic textured paper, which I then matted to purple paper. I then attached it to the center of my card. Next I made the sentiment by printing out on white card a long strip of pink with yellow "Happy Birthday" text in the middle, I then folded the ends to create a banner and trimmed off the excess. I attached my banner sentiment to the top left of my digi with double sided foam tape. I then attached a raspberry satin ribbon across my card towards the bottom of my digi. Lastly I made a double bow out of multi-coloured cord and glued it to the center of the ribbon.

This card was a load of fun to make and I would once again like to thank Lisa from Willow Sketchie Challenge for her fantastic sketch. Good luck to all that enter. :D

Saturday 4 February 2012

Monkey Valentine's Day Card

My Boyfriend went to a buck's party tonight, so I thought while he was gone I would make his Valentine's Day card. I also made this card for my entry in this week's Willow Sketchie Challenge. Hope you all like it. :D

Monkey Valentine's Day Card


I used white card for my base card, which I covered with a glitter black spot patterned card.

I then coloured in a free Dustin Pike Monkey Digi Stamp in Photoshop, printed it on white card and then cut it out to a rectangle. Next I matted the digi to a piece of black card, which I then matted again to a piece of red foil card. I then attached it to the center of my card using double sided tape. I attached a red love heart ribbon across my card towards the bottom of the digi. I then made a bow out of a red love ribbon and attached it to the center of the love heart ribbon. Next I glued a red diamonte heart to the middle of the bow. Lastly I made and attached the sentiment.


1. First of all to make the sentiment I made and printed out on white card a long strip of red with the text "Happy Valentine's Day" in the middle. I then decided to roll the ends in, just to make it a bit different.
2. To roll the ends in, first you need to fold the end back (make sure you leave a few cm between the end of the text and the fold).
3. Then it's as simple as bending the edge of the fold over and rolling to where desired (make sure you stop at least 1cm before or after your text).
4. Then carefully roll the ends over so that you can flatten them out.
5. I then trimmed the ends into a  "V" shape.

I really enjoyed making this card, particularly the sentiment and I would like to thank Lisa from Willow Sketchie Challenge for a fantastic sketch. Good luck to all that enter. :D

Wednesday 1 February 2012

6 Year Old Harry Potter Card

Running late again I know, but I made this card this afternoon for my entry in this week's Willow Sketchie Challenge. It is also for my Harry Potter obsessed nephew's 6th Birthday. Hope you all like it. :D

6 Year Old Harry Potter Card


I used white card for my base card, which I covered with a piece of black card for extra strength. I then cut a rectangle out of red flecked metallic paper and matted it to gold paper.


I printed out 3 Harry Potter emblems from Google Images onto white card, trimmed around them and glued them to the top left corner of my card.


I then found a Harry Potter colouring page also using Google Images, I coloured it in using Photoshop, printed it on white card, trimmed around it and attached it to the red and gold rectangle. Next I attached the rectangle to my card using double sided tape. As I still haven't got my die cutter yet, I made the "6" sentiment by hand. First I made a circle template out of a scrap piece of white card, I then traced it onto gold paper and cut it out. I then drew a 6 onto the white card circle template and cut it out, next I traced it onto red flecked metallic paper and cut it out. I then glued the 6 to the middle of the circle and glued it to the bottom right corner of my card. Lastly I used glitter glue to create magic bolts coming out of the wand.

This was a fun card to make and I can't wait to give it to my nephew. I would like to thank Shell from Willow Sketchie Challenge for a fantastic sketch. Good luck to all that enter. :D