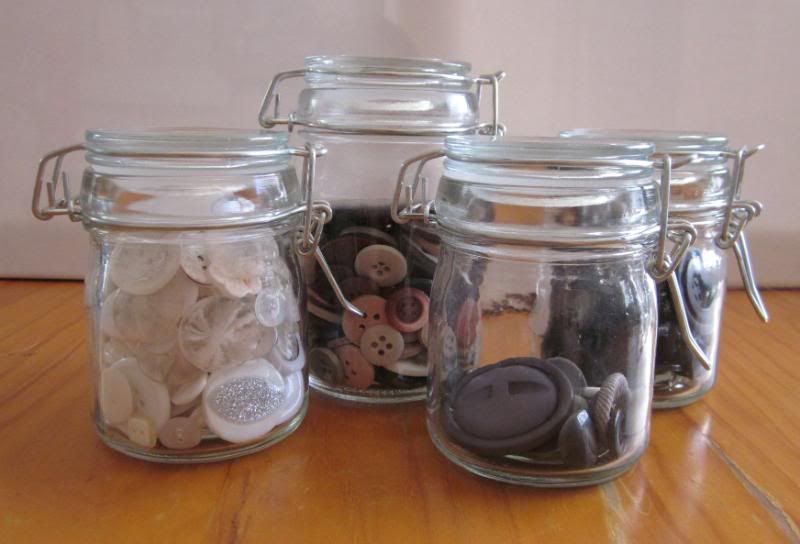
Monday 29 August 2011

Button Storage

Over the years I seem to have collected quite a few buttons. I have always kept them all in a tin, but I was sick and tired of always having to tip the tin out to find a particular colour button. So after much thought I finally come up with a solution...

Button Storage

I found a spice rack for $14.95 in a bargain store, which was just perfect for all my bright coloured buttons. Best of all if I want to move it I don't have to pick up several jars, I just pick up the whole entire rack. :D

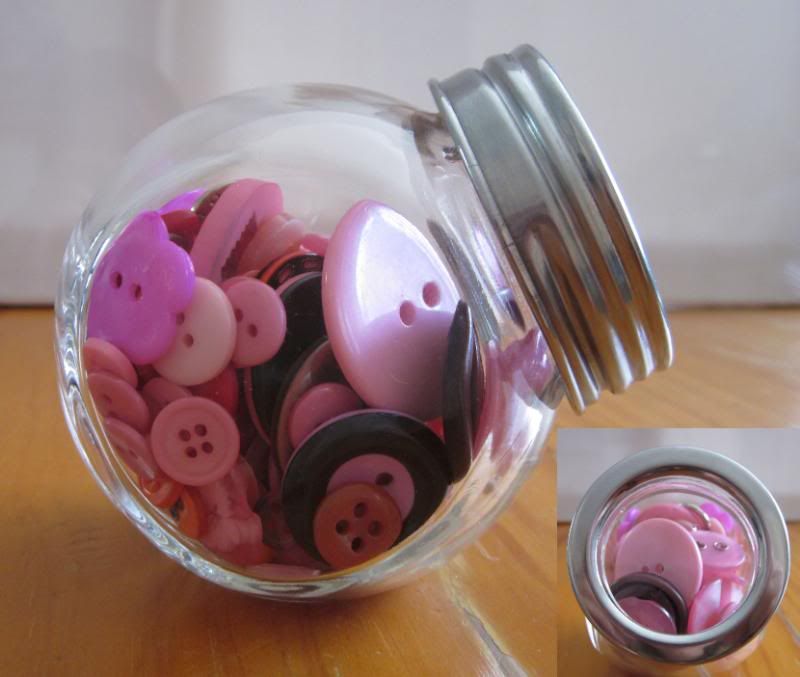
They are the perfect size and make finding the right coloured button all too easy. :D

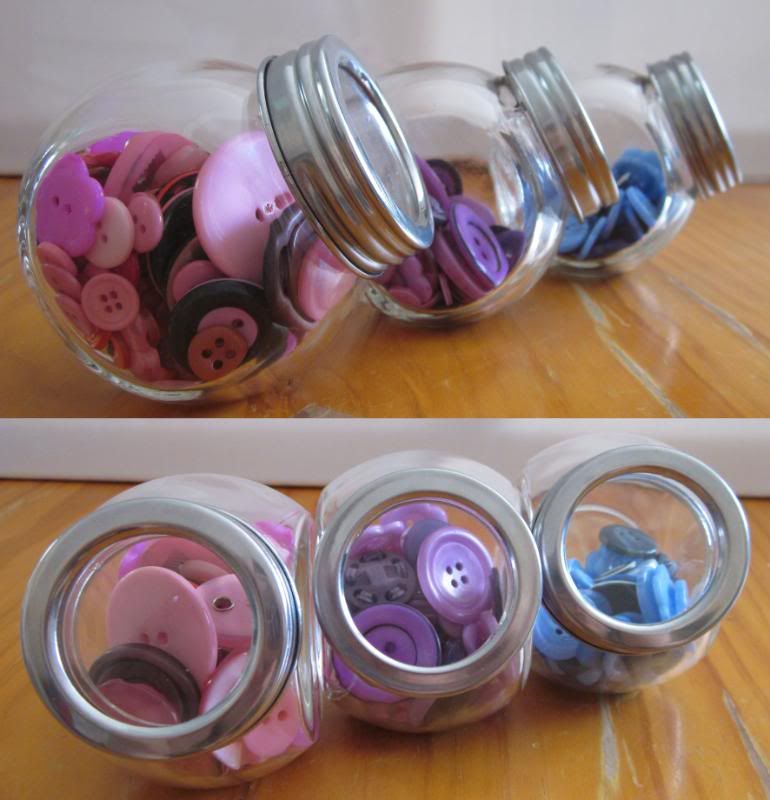
Best part is that not only can I see the colours through the sides of the jars, but I can also see them through the lids... So no need for labeling each jar. :D

However the spice rack did not have enough jars for every colour button that I have. So I also had 2 purchase 4 jars for my duller colour buttons. But I had so many brown, white and black buttons that I needed bigger jars for them anyway. :D

Sunday 28 August 2011

Pink And Black Birthday Card

I made this card tonight to enter into this weeks Mojo Monday Sketch Challenge. This is my first ever entry in a Mojo Monday Challenge, and I had a lot of fun designing and creating this card. I went with a pink and black theme, as I love those 2 colours together. Hope you all like it. :D

Pink And Black Birthday Card


To make this card I used a black textured card as my base card, and I used pink and black plain and patterned papers. I stitched 2 lines of black thread down the pink polka dot paper.

For the circle element I used a pink silk flower, and a Happy Birthday circle sentiment that I made and printed out on white card. I then cut the sentiment out and glued it to another piece of white card, when dry I repeated this process again to add strength as well as dimension. I then attached it to the flower using a white brad. Next using double sided tape I attached it to the card.

For the ribbon across the page I used a black and white polka dot ribbon. Using the same ribbon, but in pink, I made a bow by folding the ribbon over and stitching it in place. I then stitched the pink bow to the black ribbon. Next I made a loopy bow out of black cord, and stitched it to the pink bow. I then stitched a black and white polka dot button to the bows. Lastly I attached the ribbon to the card using double sided tape.

I enjoyed making this card a lot and would like to thank  Maria Gurnsey for the great sketch. Good luck to all that enter. :D

Friday 26 August 2011

Father's Day Card

This is the card that I made tonight for this week's Willow Sketchie Challenge. Thought seeing as Father's Day is coming up here in Aus I would create a card especially for my Dad. :D I loved the sketch this week... It was great to work with :D. Hope you all like my card. :D

Father's Day Card

To make this card I used an orange card as my base card, I cut a smaller square out of patterned card, and an even smaller one out of metallic brown paper. I glued a piece of blue ribbon onto the orange card before attaching the patterned card with double sided foam tape, which I then glued the brown paper to. I then attached 3 brown brads to the bottom right hand corner of the card.

For the image, I cut a shirt out of patterned paper and made a coat hanger out of copper beading wire. I then taped the coat hanger to the back of the shirt and attached the shirt to the card using double sided foam tape.

For the text I cut a rectangle out of white card and a slightly larger rectangle out of brown metallic paper. I then attached the white rectangle to the brown one using double sided foam tape. Next using a black marker I wrote the word DAD on the white rectangle.


I loved designing and creating this card for my Dad and would like to thank Pauline from Willow Sketchie Challenge for the sketch. Good luck to all that enter :D
 

Monday 22 August 2011

Free You Are Very Special To Me Sentiment

Here's a free You Are Very Special To Me Sentiment for you to download. Simply click on the image to open it in it's own window then right click on the image and save. :D

You Are Very Special To Me Sentiment


If you use these free items and post your creation to a blog, please leave the link in comments, so that myself and others can see it. Thanks :D
 

Saturday 20 August 2011

I've Been Bitten By The Love Bug Card

I made this card today as my entry for this week's Willow Sketchie Challenge. The sketch this week was a little more trickier than last week's, as it had far more detail. Lisa from Willow Sketchie challenge also threw in a recipe along with her sketch, which was: 1. Add some shimmer/sparkle, 2. Add something floral and 3. Use something yellow. Hope you all like it. :D


I've Been Bitten By The Love Bug Card


I used a red textured card as my base card, I also cut a wavy rectangle out of yellow card and a rectangle (which I cut bite marks out of) out of white card. And for the text element of the sketch I used a wooden Love heart embellishment.

 For my image I used My Free Love Bug Digi Stamp, which I printed on white card and altered slightly in Photoshop, by colouring it's face black, lips red and putting an oval around it. Here I added my sparkle and shimmer element by colouring in the flower with a red shimmer marker and gluing red glitter onto the Love Bug's wing (I also covered myself, the table and the floor in glitter aswell... Lol). I then finished it off by colouring in the flower stem and belly with markers.

I wrote on the white card using black and red markers. For the ribbon I used black and red satin ribbons. I glued the thinner black ribbon to the thicker red ribbon and attached it to the yellow card using white polka dotted red brads, and then glued it to the card itself.


For the floral element of the recipe I used a Pre-made ribbon flower embellishment, which I then stuck a wooden lady bug embellishment to.

Once again I had a blast designing and creating this card and would like to thank Lisa from Willow Sketchie Challenge for the sketch and recipe. Good luck to all that enter :D
 

Thursday 18 August 2011

Free Love Bug Digi Stamps

Here's a free Love Bug digi stamp for you to download. I have uploaded 3 variations. Simply click on the image to open it in it's own window then right click on the image and save. :D

Free Love Bug Digi Stamps

Example Of Use


If you use these free Digi Stamps and post your creation to a blog, please leave the link in comments, so that myself and others can see it. Thanks :D

Sentiments Giveaway

The Emerald Faerie Garden is giving 1 lucky person the chance to win a set of their fabulous New Digi Faerie Drop Sentiments. All you have to do is post this excellent giveaway on your blog, then pop on over to The Emerald Faerie Garden Challenges Blog and enter your name and blog post url. Winner will be drawn 22nd August. Good luck. :D

Tuesday 16 August 2011

My 1st Willow Sketchie Challenge Entry

Thought it was about time I entered a blog challenge... And what better place to start than the Willow Sketchie Challenge ... Here's the card I made today for my entry :D

Willow Sketchie Challenge Card


To make this card I used a plain white card, which I glued a Blue ribbon across. I then cut a circle out of pale blue card, and a slightly larger 1 out of bright blue card. On the back of the bright blue circle I divided it into wedges, which I then cut every 2nd 1 out, leaving 1cm of each wedge in the middle of the circle to hold it together. Next I glued the middle of the bright blue circle to the pale blue circle, and the pale blue circle to the card. I then stuck double sided foam tape squares to the ends of the blue circle wedges, to give it some dimension. I printed my Free Thank You Sentiment (which I made especially for this challenge ;) ) on some white card and cut it out, I then attached it to the center of the circles using double sided foam tape. I glued 3 white paper buds to the top right of the bright blue wedges. Lastly using the double sided foam tape yet again I attached the Bird which was a diecut shape from Grant Archival's Grace Taylor range.

I have had fun creating this card and would like to thank Kate from Willow Sketchie Challenge for the sketch. Good luck to all that enter :D

Another Free Thank You Sentiment

Here's a free Thank You Sentiment for you to download. I have uploaded 2 variations. Simply click on the image to open it in it's own window then right click on the image and save. :D

 Free Thank You Sentiments

 Example Of Use
 

If you use these free items and post your creation to a blog, please leave the link in comments, so that myself and others can see it. Thanks :D

Saturday 13 August 2011

Autumn Card

Here is an Autumn card which I completed today. :D

On A Crisp Autumn Day Card


For this card I used a bike diecut shape from Grant Archival's Grace Taylor range (which for all my fellow Aussie's is available at Big W stores), an Autumn chipboard sticker, a silk flower with a brad through it, a button with brown leather threaded through it and then tied in a bow, a metal corner embellishment, a spotted brown ribbon, metallic brown paper, worded paper in neutral tones and a textured brown card. :D

Friday 12 August 2011

Pixie Kit Giveaway

Pixie Dust Paperie August Giveaway

Pixie Dust Paperie is giving 1 lucky person the chance to win a Pixie Kit. All you have to do to be in with a chance at winning this fantastic prize is become a follower (to get one chance) and post the giveaway on your blog with a link back to Pixie Dust Paperie, Then go back to the giveaway page and leave your blog link in the comments (to get another chance). :D

Thursday 11 August 2011

Worldwide Candy Giveaway

Bunny Zoe's Crafts Paper Pad Giveaway

Bunny Zoe's Crafts is giving 1 lucky person the chance to win a 6x6 Journey Paper Pad by Authentique. The pad contains 36 pages with 12 designs. To be in with a chance to win this great prize visit Bunny Zoe's Crafts Candy Time enter your name and blog link, become a follower and post this awesome giveaway on your blog. But hurry, as the competition closes on Friday, 12th August at midnight GMT. :D

Wednesday 10 August 2011

Free Always In My Heart Sentiment

Here's a free Always In My Heart Sentiment for you to download. Simply click on the image to open it in it's own window then right click on the image and save. :D

Free Always In My Heart Sentiment


 If you use this free item and post your creation to a blog, please leave the link in comments, so that myself and others can see it. Thanks :D

Tuesday 9 August 2011

Sheena Douglass Giveaway

Sheena Douglass Christmas Fusion Stamps  Giveaway

Sheena Douglass is counting down to the launch of her new Christmas Fusion Stamps on Create and Craft. She will be giving sneak peeks of the range on her blog all week. She is offering 1 lucky person the chance to win her full set of the new Christmas Fusion stamps, the accompanying DVD and a rare Sheena original signed piece. To enter the competition simply head on over to Sheena's Blog , post the competition on your own blog/ Facebook/ other social media site, then go back to Sheena's Blog and leave your details. Winner will be randomly picked... Good luck :D

Sunday 7 August 2011

Spiderman 31st Birthday Card

Here is a Spiderman 31st Birthday card that I made today for my Boyfriend's Birthday using a spiderman image off the web and my Free Growing Old With You Sentiment :D

Spiderman 31st Birthday Card


First I found a picture of Spiderman that I liked using Google Images. I then downloaded a Spiderman font, which I also found using Google. Next I printed both onto art paper, and coloured them in using water colour pencils, which I then blended with a wet brush. Once they were dry I cut them out. Then I cut 3 balloons out of coloured paper, which I layered and glued together. I glued the "Happy Birthday" text to the balloons. I then glued Spiderman to a blue texture card (but I didn't glue his right hand down yet). Next I cut some lengths of silver cord, which I glued 1 end of each underneath Spiderman's right hand (and glued his hand down in the process). Next I glued the other end of the cord to the card where the balloons would sit. Once it was dry I used double sided foam tape to stick the balloons onto the card. Then I put a star brad on 1 of the balloons. Lastly I stuck on the 31, using foam letters.

Inside the Spiderman 31st Birthday Card


The sentiment I used for this card was the free Growing Old With You sentiment available on my blog at http://teegsscrapncards.blogspot.com/2011/08/free-growing-old-with-you-sentiment.html

I cut around my free Growing Old With You sentiment and stuck it onto some blue paper. I then cut around the blue paper and glued it to the inside of the card. :D

Free Growing Old With You Sentiment

Here's a free Growing Old With You Sentiment for you to download. Simply click on the image to open it in it's own window then right click on the image and save. :D

 Free Growing Old With You Sentiment
 If you use this free item and post your creation to a blog, please leave the link in comments, so that myself and others can see it. Thanks :D

Thursday 4 August 2011

Free Icecream Digi Stamps

Here's some free Icecream digi stamps for you to download. Simply click on the image to open it in it's own window then right click on the image and save. :D

Free Icecream Digi Stamps


 Example Of Use
**Coming soon**

If you use these free Digi Stamps and post your creation to a blog, please leave the link in comments, so that myself and others can see it. Thanks :D

Monday 1 August 2011

Free Thank You Sentiments

Here's a free Thank You Sentiment for you to download. I have uploaded 3 variations. Simply click on the image to open it in it's own window then right click on the image and save. :D

Free Thank You Sentiments 


 If you use these free items and post your creation to a blog, please leave the link in comments, so that myself and others can see it. Thanks :D