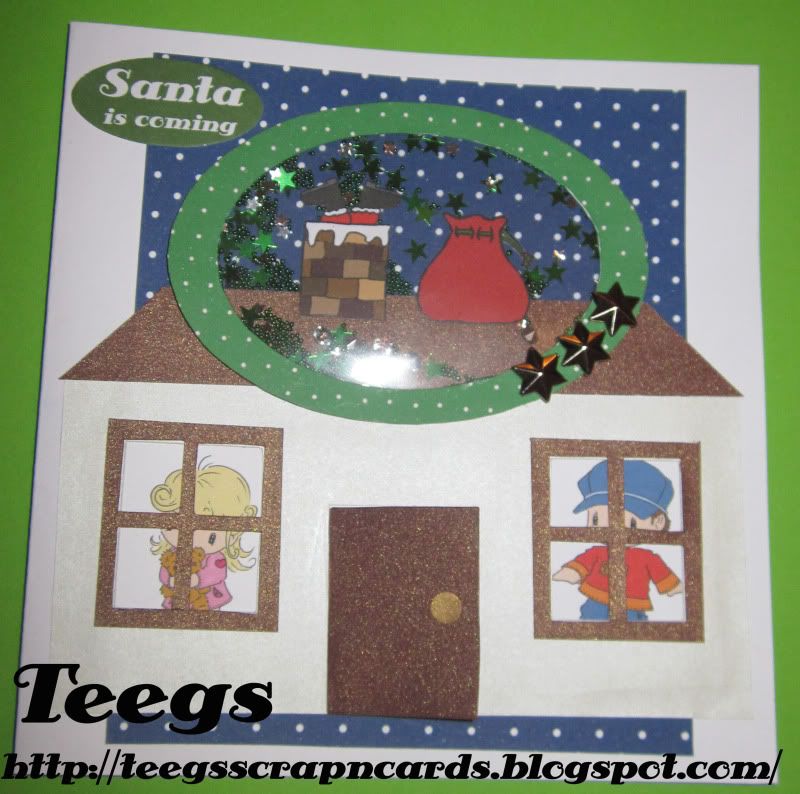
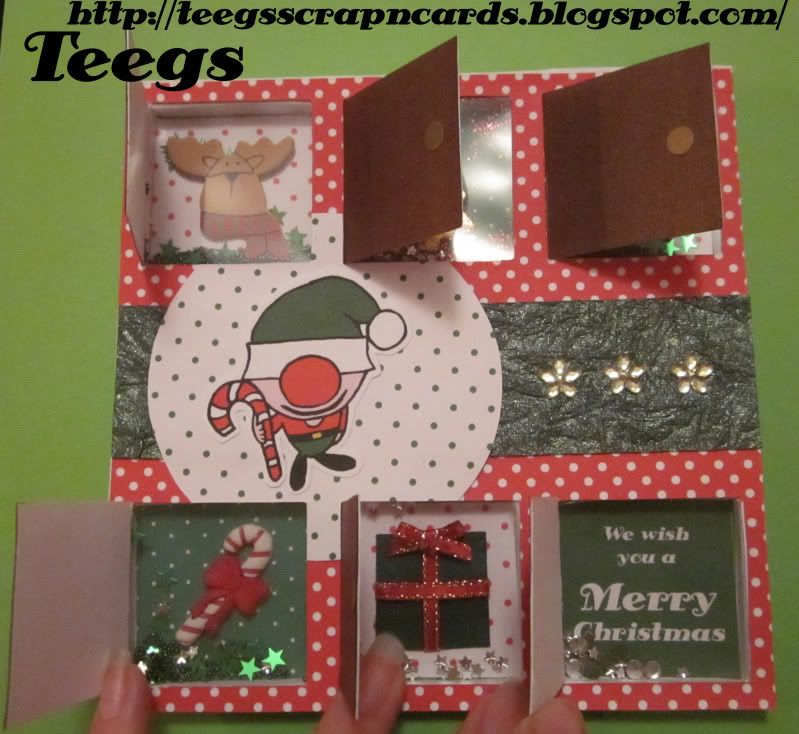
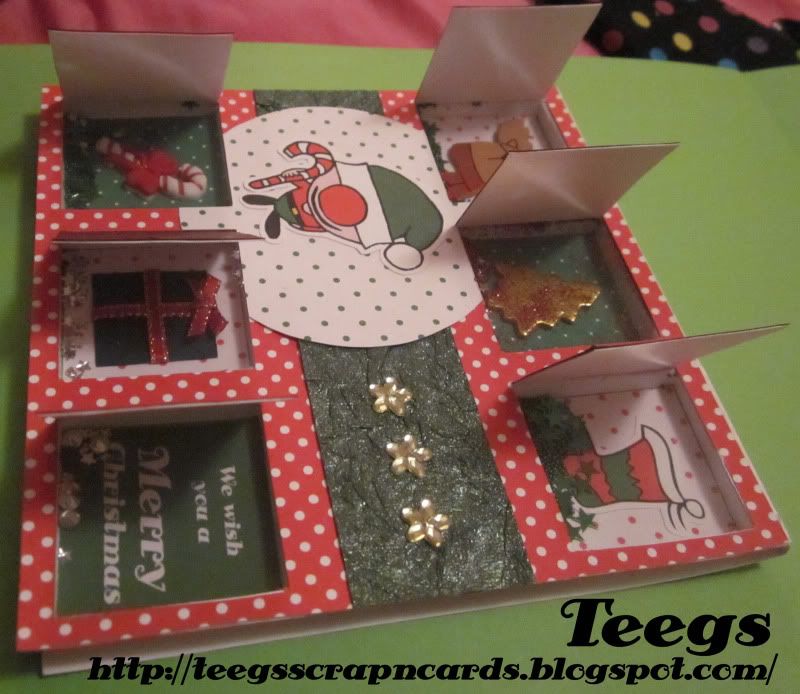
Here's the card that I have been slowly making the past few days for my entry in this week's Willow Sketchie Challenge. I wanted to do something a bit out there and this week's sketch gave me the idea of a Christmas Advent style shaker card. Hope you all like it. :D
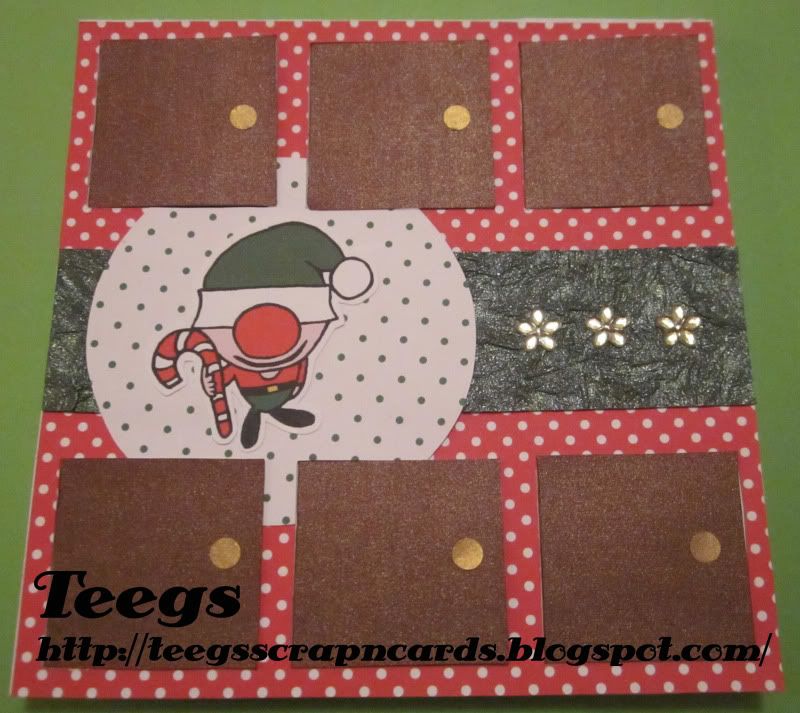
Christmas Advent Shaker Card
Advent Shaker Card Tutorial
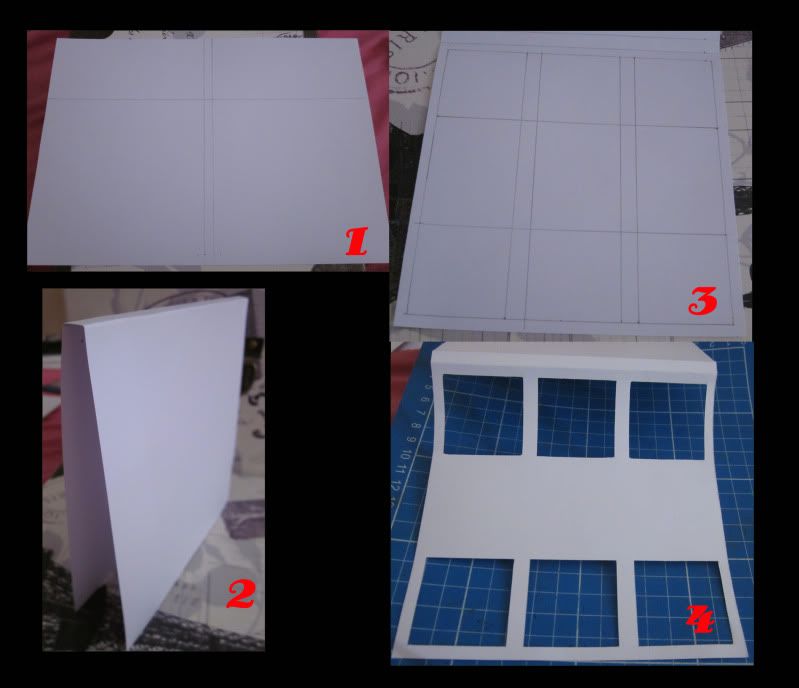
1. I used an A4 sheet of white card to make the card itself. I drew a line 14cm from both top and bottom of the sheet, this created a strip down the middle for the card fold. I then also drew a line 14cm in from one side of sheet. I then cut the excess off.
2. I then folded along both lines either side of the card fold strip.
3. Next I turned the card over and drew up a grid for my advent windows (each window was 4 x 4cm).
4. I then cut the windows out using a craft knife and cutting mat.
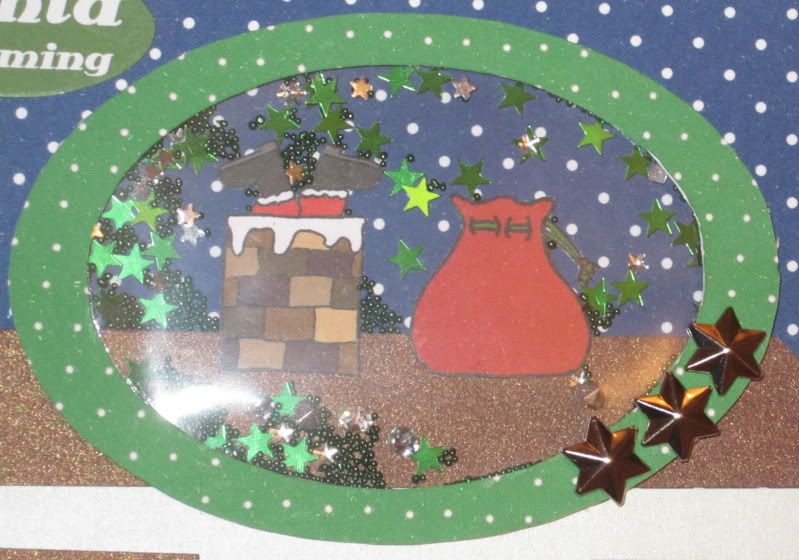
I then covered the front of the card with patterned paper (I chose red with white polka dots) and once it was stuck on I then cut the windows out of it as well. I glued a strip of metallic green handmade paper across the middle of the card. I then cut a circle out of white and green polka dot paper to put under the digi and glued it on, and once again cut the windows out of it.
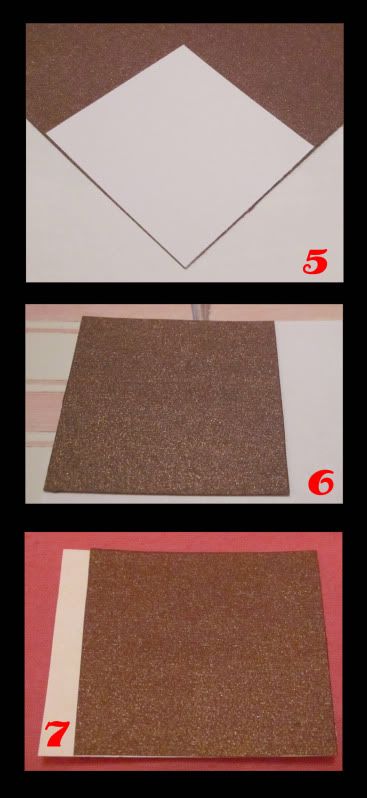
5. I used the squares I cut out of the windows to make the doors. First I glued them onto a piece of metallic brown paper and then cut them out.
6. I then glued the reverse side to a piece of A4 computer paper.
7. I then cut them out again, leaving a 5mm flap on one side. I then sat them on top of the windows and pushed and glued the flaps to the inside of the card.
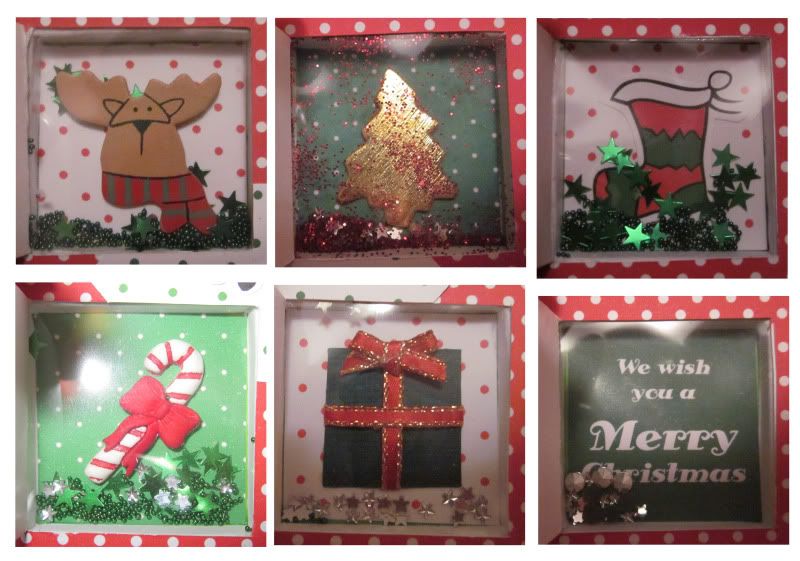
8. On a piece of white card I measured out the templates for the shaker boxes and cut them out (I made them in strips of 3 and cut them out individually before attaching them to the card, there were 6 boxes in total). I then cut tabs into the zig zag corners of each and glued them up into little boxes.
9. I then glued plastic transparency across the windows to the back of the card. Next I glued papers and embellishments to the inside of my boxes. Once dry I added my shaker ingredients (I used glitter, mini diamonte stars, diamontes, foil stars and glass bead balls). I then glued each box to the back of the card and glued scraps of paper over any gaps.
I used a hole punch to make the door handles out of gold paper. I then finished off my card by gluing 3 green star diamontes to the metallic green handmade paper strip, and my elf digi to the circle. The elf digi I made myself and is available here.
This is the funnest card I have ever made, and possibly one of the best and I would like to thank Kate from Willow Sketchie Challenge for a very inspiring sketch. :-* Good luck to all that enter. :D