Friday, 23 December 2011

Camera Money Card

Here's a card that I made yesterday for my Boyfriend's Brother. He recently bought a new SLR digital camera and has been buying loads of accessories for it. And as we weren't quite sure what he needed we are going to give him some money to buy something for it for Christmas. So I decided to make a camera shaped card that has a pocket inside to put the money in, so we can wrap it up and put it under the Christmas tree. Hope you all like it. :D

Camera Money Card


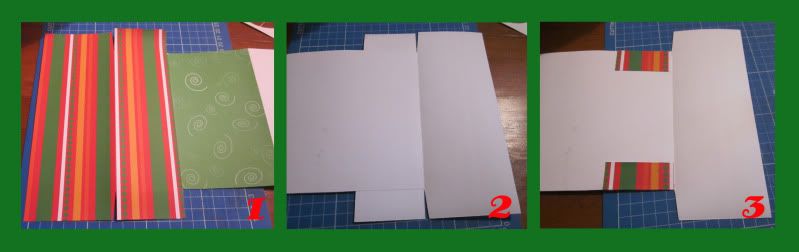
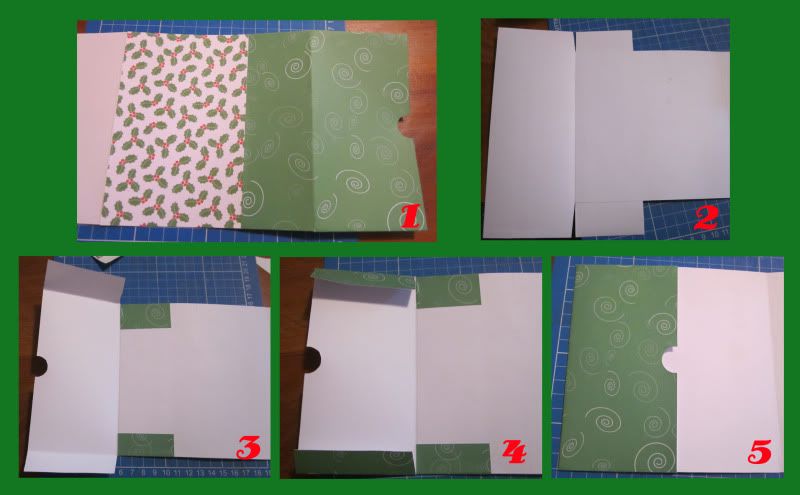
I used a piece of black A4 card for my base card. I made a fold at 11cm and another at 22cm (leaving roughly 7cm after the last fold for the money pocket). I then folded 2 strips of black card (2 x 6cm) in half and attached one to each side of the the money pocket, and the other half to the inside of the card.


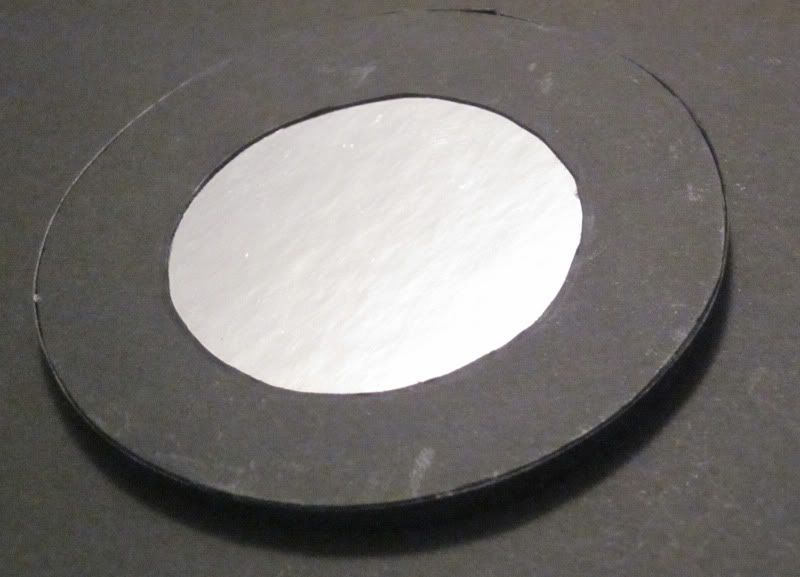
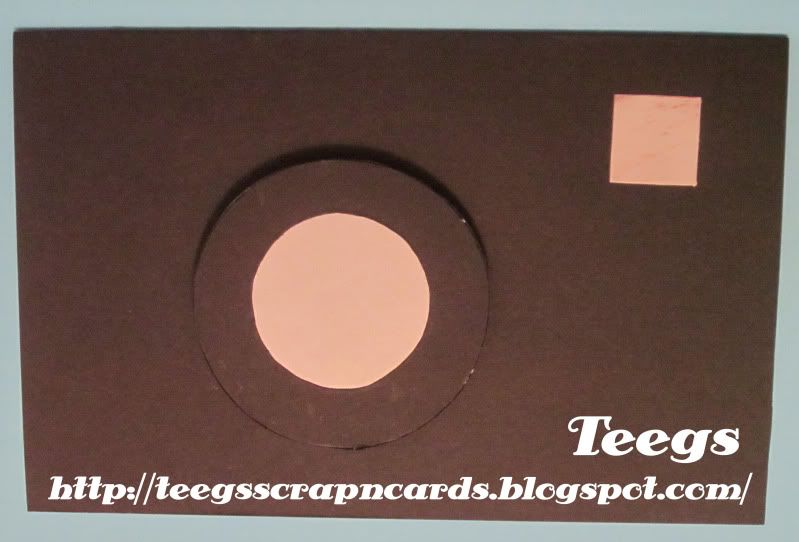
For the front of the card I made a lens by cutting a circle out of black card, and cutting a smaller circle out of the middle of it. I then cut a circle out of silver mirror card slightly smaller than the outer circle of the lens and glued it to the back of the black circle. On the back of the lens I then stuck double sided foam tape all around the edges, I then put another layer of double sided foam tape over the top of the first layer to give it some height. I then trimmed off the excess double sided foam tape from the edge of the lens. Next I cut a strip of black card the same thickness as the 2 layers of double sided foam tape and glued it around the edge of the double sided foam tape. I then peeled off the protective coating on the last layer of double sided foam tape and attached the lens to the card. I then cut a small square out of silver mirror card for the flash and glued it to the top right of the card.


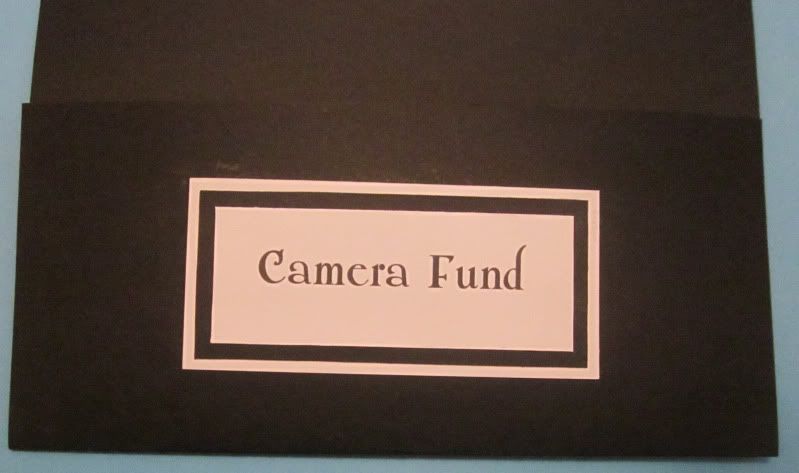
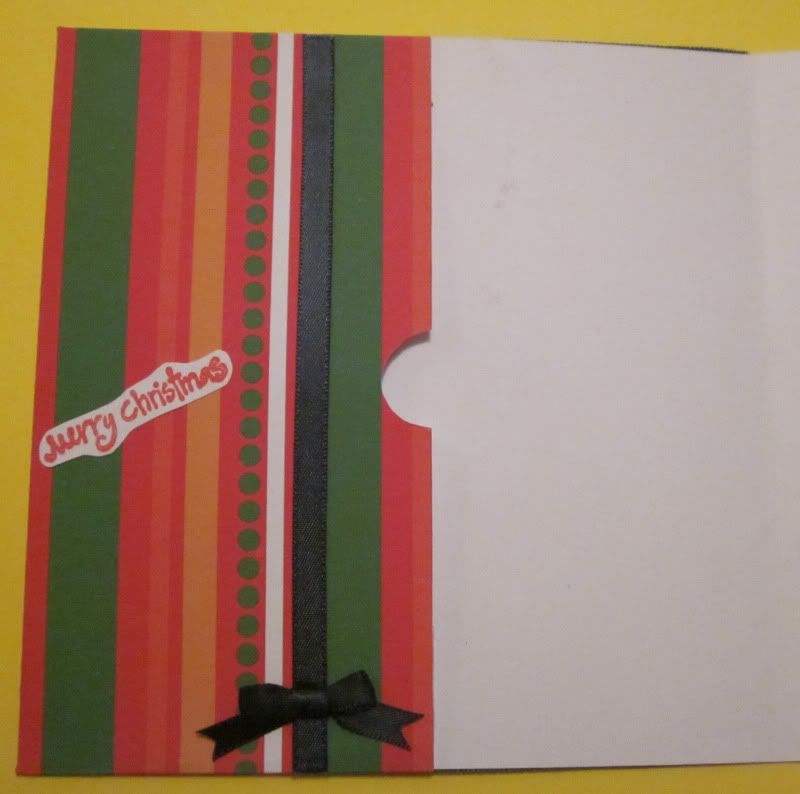
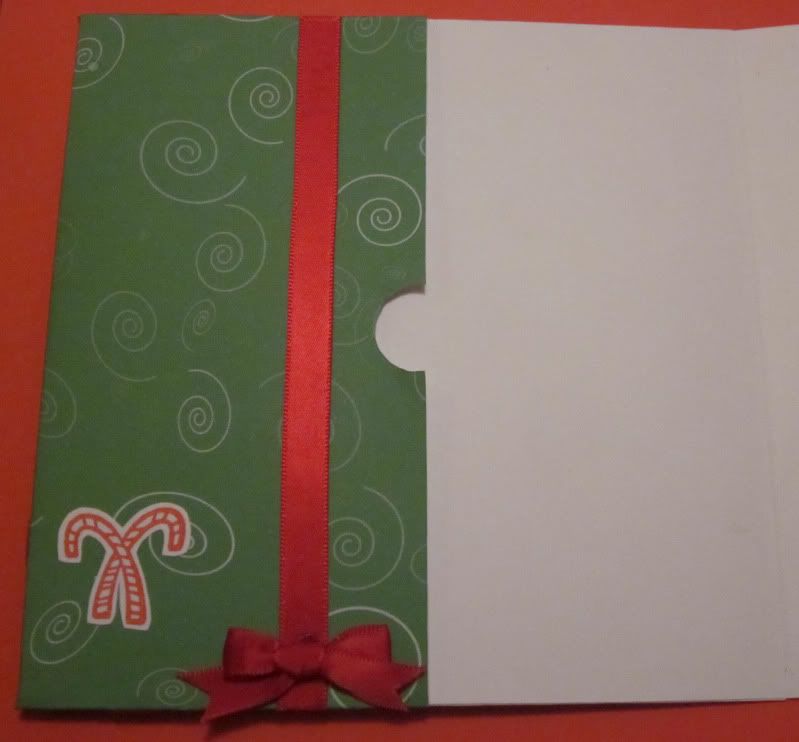
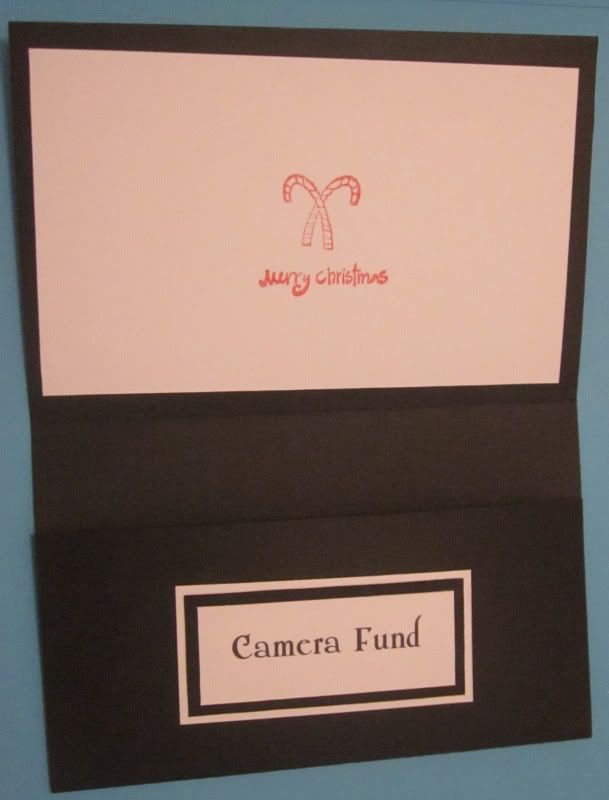
For the inside I cut a rectangle out of white card which I attached to the top flap and then stamped the middle of with a "Merry Christmas" sentiment with red ink. I then made a simple text "Camera Fund" sentiment in Photoshop, printed it on white card and trimmed it to a rectangle. I then glued it to a slightly larger black card rectangle, and again to a slightly larger white card rectangle. Lastly I glued it to the center of the money pocket.

19th Birthday Card

I made this card yesterday for a friend of our's whose Birthday is 2 days after Christmas. He is 4WD crazy like my Boyfriend, and loves his Suzuki Sierra (Samurai), so that gave me the idea for the image. Hope you all like it. :D

19th Birthday Card


For this card I used a blue card as my base card. I then coloured in a Suzuki Sierra (Samurai) colouring page (I found using Google Images) in Photoshop, printed it on white card and cut it out. I then matted it to a piece of dark blue metallic paper and attached it to the top of the card. Next I added a blue "19" to the center of a "Happy Birthday" sentiment using Photoshop, printed it on white card and trimmed around it. I then attached a strip of striped patterned paper across the bottom of the card. Lastly I attached the sentiment to the center of the striped paper strip.

Wednesday, 21 December 2011

2 Quick Christmas Cards

I made these 2 quick Christmas Cards today to give to 2 friends that I will be seeing tomorrow. Hope you all like them. :D

 2 Quick Christmas Cards


I made these cards small (12 x 8cm) so that I could fit them in pre bought envelopes to save me a bit of time making them. Each card has white card for a base card.


For this card I coloured in my free Elf Digi Stamp in Photoshop, printed it on white card and cut it into a rectangle. I then matted it onto a green paper rectangle. I also printed a "Merry Christmas" sentiment (which I had made previously in Photoshop) onto white card, trimmed round it and matted it to red paper which I then also trimmed around. I attached a red Christmas ribbon across the bottom before sticking the Digi and sentiment into place.
 
 
For this card I coloured in a free My Memories Of Days Gone By Santa Digi in Photoshop, printed it on white card and cut it into a rectangle. I then matted it onto a red paper rectangle. I also printed a "We wish you a Merry Christmas" sentiment (which I had made previously in Photoshop) onto white card, trimmed around it and matted it to red paper which I then also trimmed around. I attached a red Christmas ribbon across the bottom before sticking the Digi and sentiment into place.
 

Wednesday, 14 December 2011

Quick Reindeer Card

Here's my entry that I made tonight for this week's Willow Sketchie Challenge. It was a quick card as I was running out of time, plus my printer has decided to play up, and I couldn't print out any new digi's, papers or sentiments. :( Hope you all like it. :D

Quick Reindeer Card


I used white card for my base card. I then cut a large rectangle out of a free green swirl patterned paper from Free Digital Scrapbooking and glued it down the left side of my card. I cut a smaller rectangle out of red and white polka dot paper and glued lengthways towards the top right of my card. Next I cut a rectangle out of yellow card and glued it towards the bottom right of my card.


I then cut a rectangle with rounded corners out of white card. I cut and glued a "Merry Christmas" ribbon to the top and bottom of the white rectangle. I then glued my Free Reindeer Digi Stamp (that I had already printed and cut out a while ago ;) ) onto the middle of the white rectangle. I then glued the rectangle to the card. Lastly I cut the back off a gold star brad and glued it to the right of the top ribbon.

Although this was a super quick card, it was still fun to make and would like to thank Anne-Marie from Willow Sketchie Challenge for a fantastic sketch. Good luck to all that enter. :D

Saturday, 10 December 2011

5 Quick Christmas Cards

I made these 5 quick Christmas Cards today to give to a group of friends that I will be seeing tomorrow. Hope you all like them. :D

5 Quick Christmas Cards


I made these cards small (12 x 8cm) so that I could fit them in pre bought envelopes to save me a bit of time making them. Each card has white card for a base card.


For this card I coloured in a Free Sliekje Christmas Tree Elephant Digi Stamp in Photoshop, printed it on white card and cut it into a rectangle. I then matted it onto a green paper rectangle. I attached a red satin ribbon down the side, and a green bow to the ribbon.


For this card I coloured in a Free Sliekje Santa's Helper Digi Stamp in Photoshop, printed it on white card and cut it into a rectangle. I then matted it onto a green paper rectangle. I attached 2 red satin ribbons criss crossing across the bottom, and a green bow to the ribbon.


For this card I coloured in a Free Sliekje Angel Of Love Digi Stamp in Photoshop, printed it on white card and cut it into a rectangle. I then matted it onto a blue paper rectangle. I used glitter glue on the snow. I attached a blue satin ribbon across the bottom, and a yellow bow to the ribbon.


 For this card I coloured in a Free Sliekje Snowman Digi Stamp in Photoshop, printed it on white card and cut it into a rectangle. I then matted it onto a red paper rectangle. I used glitter glue on the snow. I attached a red satin ribbon across the bottom, and a green bow to the ribbon.


 For this card I coloured in a Free Sliekje Singing Christmas Carols Digi Stamp in Photoshop, printed it on white card and cut it into a rectangle. I then matted it onto a red paper rectangle. I used glitter glue on the snow. I attached a red and a green satin ribbon down the side, and a yellow bow across both the ribbons.


Wednesday, 7 December 2011

Elf Money card

This is my second entry in this week's Willow Sketchie Challenge. Whilst there was no sketch or anything to follow this week, my Mum set me the challenge of making a money card for both my Nan and my Pop for Christmas. This one is for my Pop... I hope you all like it :D

Elf Money card


I used a white card as my base card. I then covered 2/3 of the card with a free green swirl patterned paper from Free Digital Scrapbooking. I then covered the remainder with a 20 x 20 sheet of striped patterned paper (leaving plenty of spare paper around the edges to make the money pocket, see tutorial below).
 
For a more detailed tutorial please see my: Reindeer Money card
1. After covering the remainder of the card with the green swirl paper, I then cut 2 slits up to the card at the top and bottom of the spare paper around the edge to create 4 flaps. I also trimmed the spare paper at the side of the card to 8cm.
2. This is what it should look like on the reverse side.
3. Next I folded over the 2 small flaps at the top and bottom. I then glued the 2 smaller flaps to the card. I then folded over the 2 larger flaps. Lastly I glued the 2 larger flaps down (put glue on the patterned side).
I then decorated the pocket with a ribbon, bow and stamped sentiment.

I then coloured in my free Elf Digi in Photoshop, printed it on white card and trimmed it into a circle. I then matted it to a circle of green paper and glued it to the center left of my card. Lastly I attached 2 "Merry Christmas" ribbons to the top and bottom of the swirl paper on the left of my card.

I had so much fun creating this card and would like to thank the DT at Willow Sketchie Challenge and my Mum for a great challenge. Good luck to all that enter. :D

Reindeer Money Card

This is my first entry in this week's Willow Sketchie Challenge. Whilst there was no sketch or anything to follow this week, my Mum set me the challenge of making a money card for both my Nan and my Pop for Christmas. This one is for my Nan... I hope you all like it :D

Reindeer Money Card


I used a white card as my base card. I then covered 2/3 of the card with a holly patterned paper. I then covered the remainder with a 20 x 20 sheet of free green swirl patterned paper from Free Digital Scrapbooking (leaving plenty of spare paper around the edges to make the money pocket, see tutorial below).


Sorry I got the order a bit mixed up in this pic, number 1 should really be number 4. :(
2. After covering the remainder of the card with the green swirl paper, I then turned it over and cut slits up to the card at the top and bottom of the spare paper around the edge to create 4 flaps. I also trimmed the spare paper at the side of the card to 8cm and cut a finger hole on the edge.
3. Next I folded over the 2 small flaps at the top and bottom. I then glued the 2 smaller flaps to the card.
4. I then folded over the 2 larger flaps.
1. This is what it should look like on the reverse side.
5. Lastly I glued the 2 larger flaps down (put glue on the patterned side).
I then decorated the pocket with a ribbon, bow and stamped image.


I then made the ribbon circle for the sentiment.
1. First I cut a small circle out of a piece of scrap white card.
2. I then cut 6 lengths of varying ribbons to the same length (mine were 12cm, so that my circle ended up 6cm). I then glued one end of one piece of ribbon from the center to the right of the white card circle.
3. I then repeated with the other end.
4. I then applied a dot of glue over the ribbon end join, and pressed the ribbon down onto it in the center.
5. Next select another piece of ribbon.
6. Repeat steps 2 to 4 making the ribbon crisscross over the first.
7. Repeat with all ribbons until you end up with something like this. Make sure you either use a peg, clip or put some weight on the circle to hold ribbons in place until it is dry (I used my glue bottle for this).


Next I made a "Merry Christmas" Sentiment in Photoshop, printed it on white card, cut it out, glued it to the ribbon circle and applied glitter glue to the text. I then coloured in a free reindeer Digi Stamp from Little Scraps Of Heaven Designs in Photoshop, printed it on white card and trimmed it into a square. I then matted it to a square of red paper and glued it to the top left of my card. I then attached 2 red ribbons to the bottom and right side of my card. Lastly I used double sided tape to attach my ribbon circle sentiment to the bottom right of my card.

I had so much fun creating this card and would like to thank the DT at Willow Sketchie Challenge and my Mum for a great challenge. Good luck to all that enter. :D