
Elf Money card

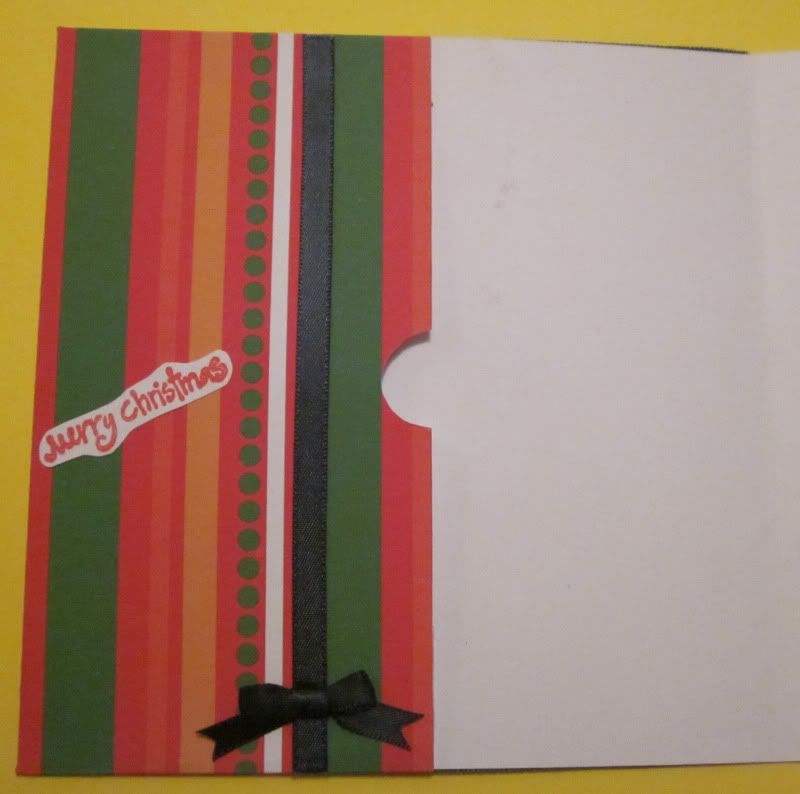
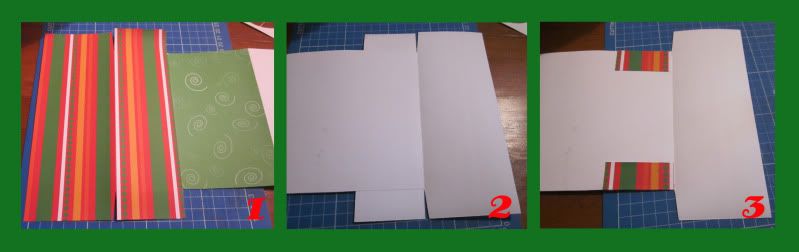
I used a white card as my base card. I then covered 2/3 of the card with a free green swirl patterned paper from Free Digital Scrapbooking. I then covered the remainder with a 20 x 20 sheet of striped patterned paper (leaving plenty of spare paper around the edges to make the money pocket, see tutorial below).
For a more detailed tutorial please see my: Reindeer Money card
1. After covering the remainder of the card with the green swirl paper, I then cut 2 slits up to the card at the top and bottom of the spare paper around the edge to create 4 flaps. I also trimmed the spare paper at the side of the card to 8cm.
2. This is what it should look like on the reverse side.
3. Next I folded over the 2 small flaps at the top and bottom. I then glued the 2 smaller flaps to the card. I then folded over the 2 larger flaps. Lastly I glued the 2 larger flaps down (put glue on the patterned side).
I then decorated the pocket with a ribbon, bow and stamped sentiment.
I then coloured in my free Elf Digi in Photoshop, printed it on white card and trimmed it into a circle. I then matted it to a circle of green paper and glued it to the center left of my card. Lastly I attached 2 "Merry Christmas" ribbons to the top and bottom of the swirl paper on the left of my card.
I had so much fun creating this card and would like to thank the DT at Willow Sketchie Challenge and my Mum for a great challenge. Good luck to all that enter. :D
Ah Love his nose its brilliant, thanks again for playing, Love Hazelxo
ReplyDeleteI love both of your money cards Teegs, another great idea on your part and so kind of you to explain how you did it, I'll have to have a go. Your ribbon circle sentiment is the perfect finishing touch.
ReplyDeleteThank you for joining us at Willow Sketchie again this week.
Pauline
x
Thanks Hazel :-*
ReplyDeleteThanks Pauline :-* Your welcome... Figured it was better to include a tutorial rather than just saying how I did it ;) If you try it and need a hand give me a yell ;) I'm glad you like them both :D
Fab Card, love the colours
ReplyDeleteLindsay xx
Thanks Lindsay :-* Glad you like it :D
ReplyDelete